
How to Use Clipboard History in Windows 11?
May 13, 2024
Clipboard might be one of the most used features in Windows. It’s become so common today to hit Ctrl+C to copy data and followed by Ctrl+V to paste it to other apps. Unfortunately, using this method only the last copied data is available. Every time you do Ctrl+C, the previous data is overwritten. To tackle this limitation, since Windows 10 there is a new feature called Clipboard History that can keep up to 25 entries of data in clipboard.
How to enable Clipboard History?
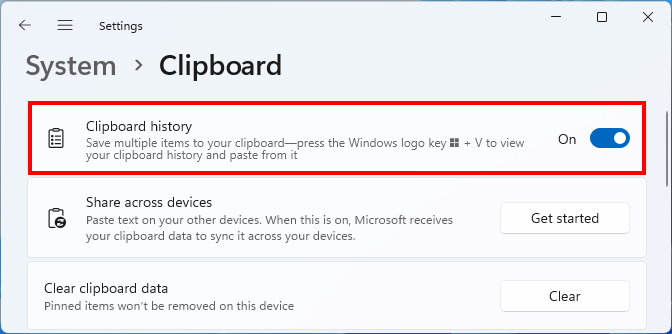
Go to Settings > System > Clipboard or search for "clipboard settings" with the search box in the taskbar. Here you can find the option for enabling the Clipboard History.
How to access Clipboard History?
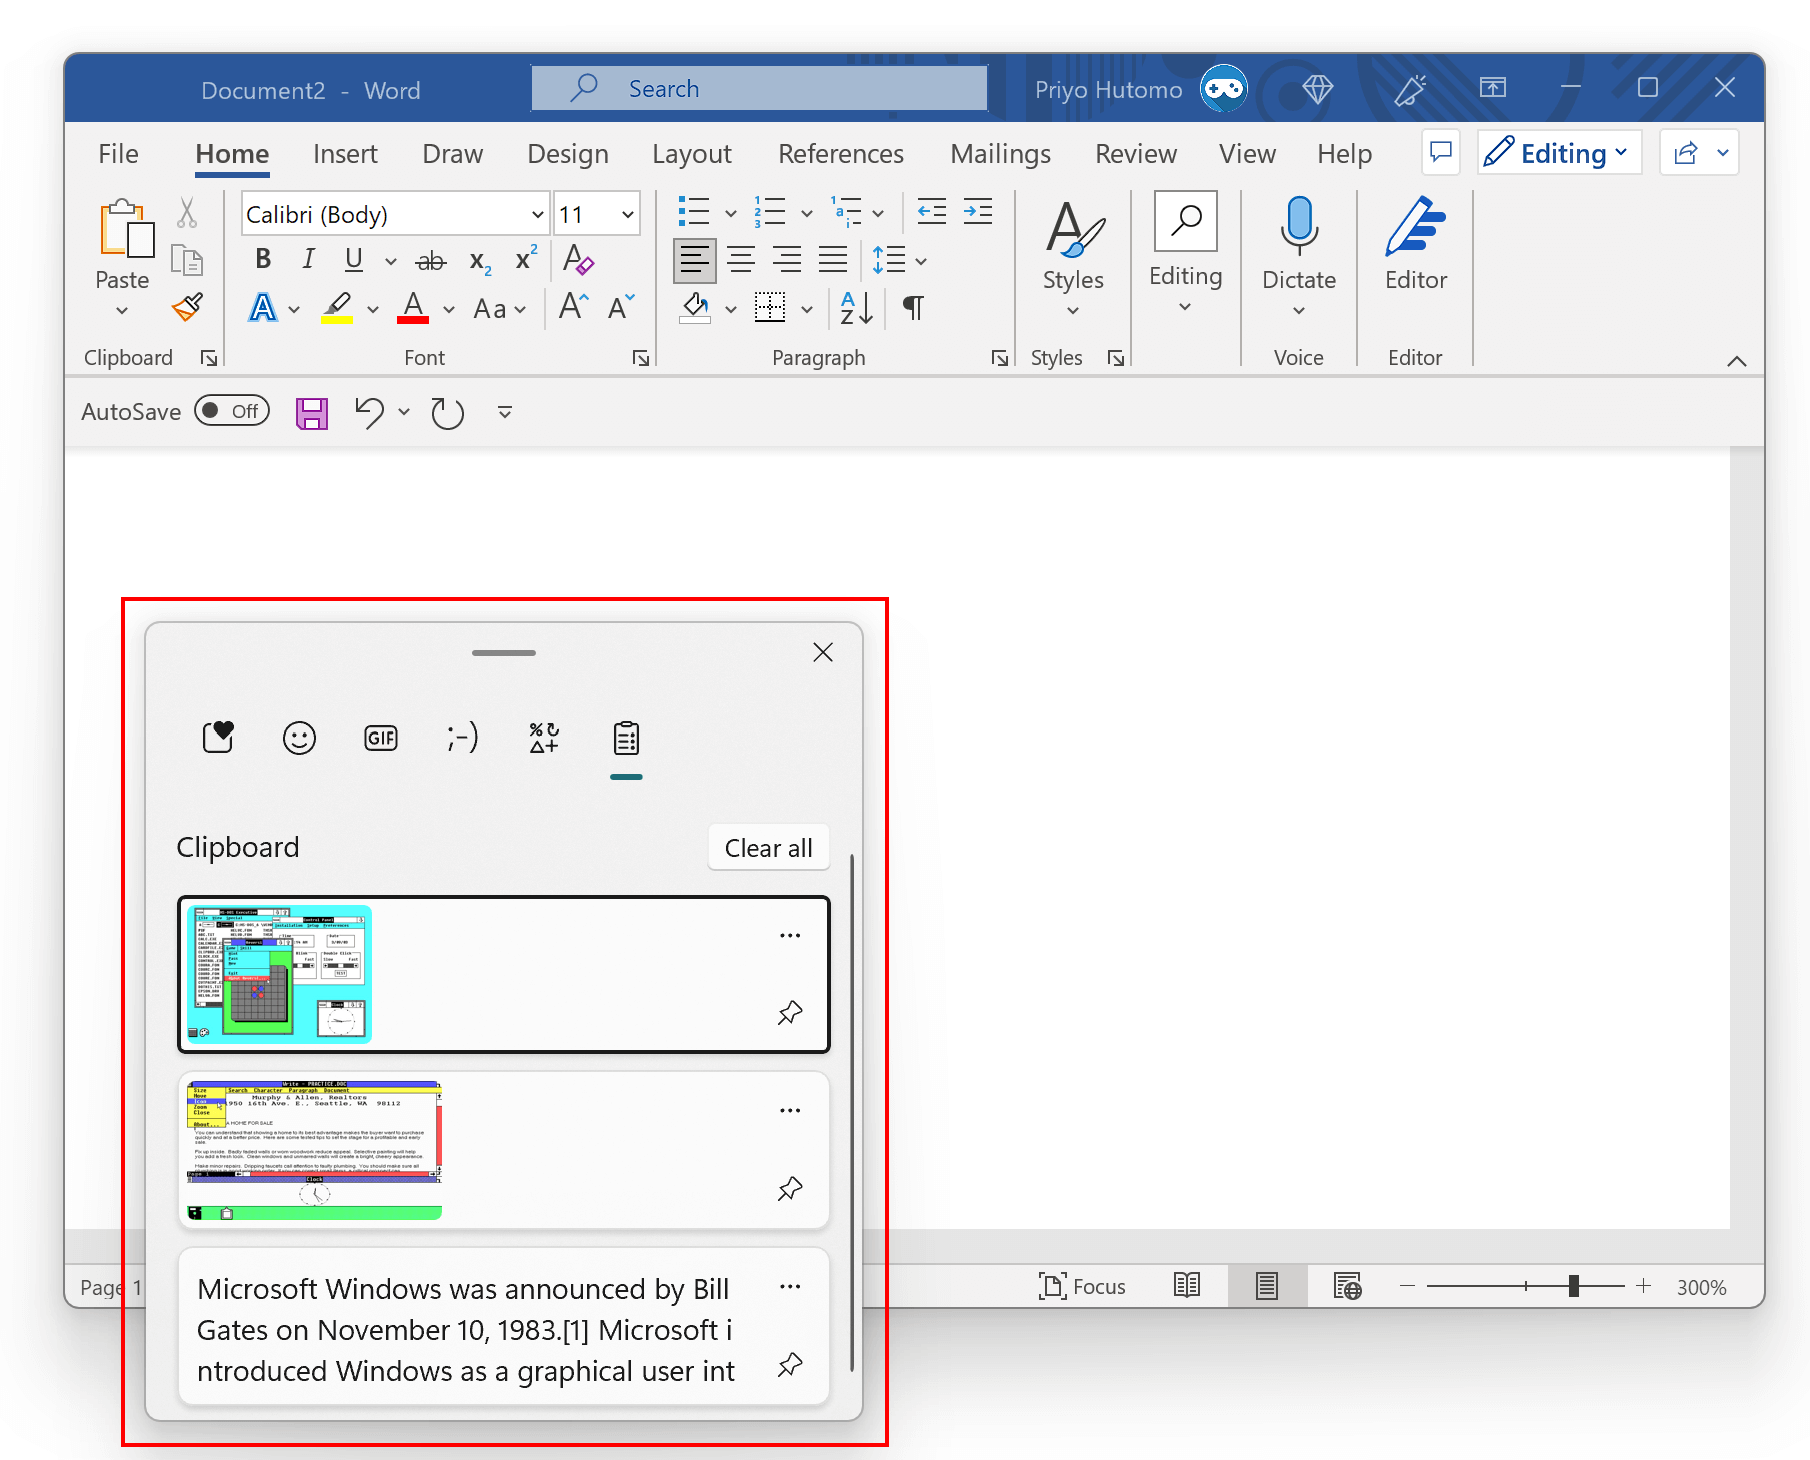
Once you have enabled Clipboard History, you can press the Windows+V shortcut to open Clipboard History.
.
How to clear clipboard data?
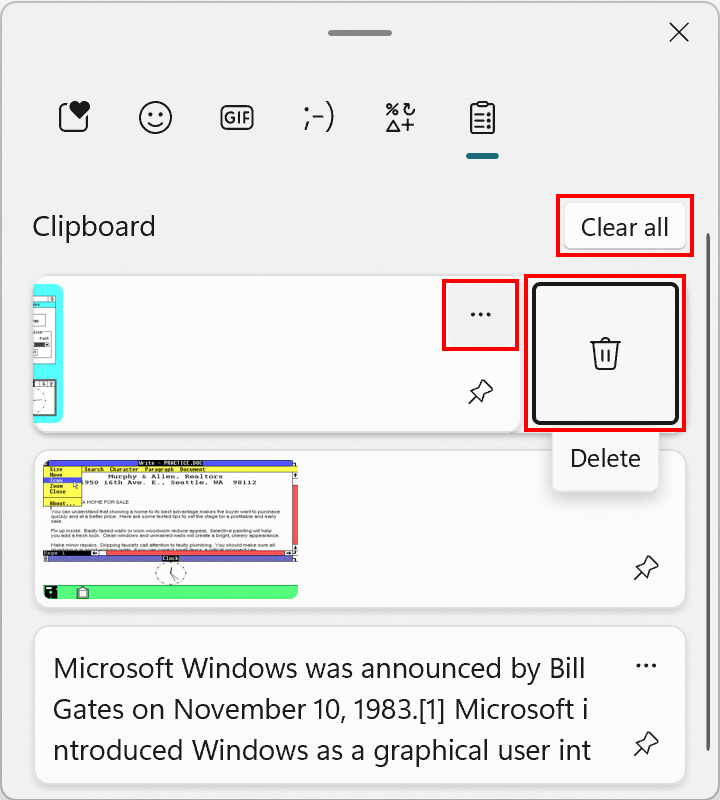
On the Clipboard History window, click the three dots button at the top right of each entry to show the Delete button. If you wish to clear all the clipboard data, click the Clear All button at the top. You can also clear all clipboard data from Windows settings by going to Settings > System > Clipboard and look at the Clear clipboard data section. Click the Clear button to clear all clipboard data from memory.
Alternatively, you can clear all clipboard data from Windows settings by going to Settings > System > Clipboard and clicking the Clear button in the Clear clipboard data section.
How to share clipboard data to other devices?
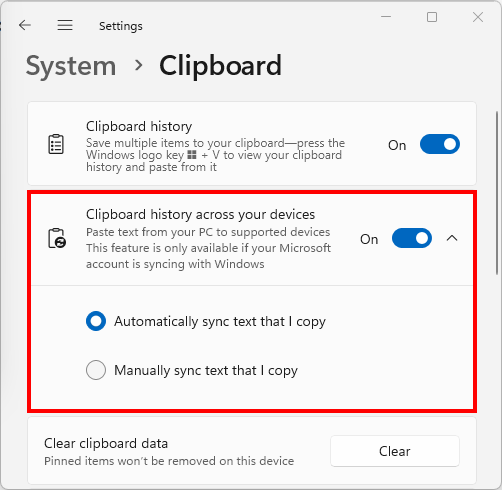
Go to Settings > System > Clipboard and find the Clipbord History across your devices section.
Click the Get Started button and complete the verification process for your Microsoft account via email or phone number.
Once verified, you can configure the option to share clipboard data with other devices, either automatically or manually.
Note that you need to sign in using the same Microsoft account on all devices to share your clipboard.