How to Take Screenshots on Windows 11?
What Is a Screenshot?
A screenshot is an image that shows the content of your computer screen. Having ability to take a screenshot is very important because it is not always easy to explain what you see on the screen to other using words.
So, how to take a screen shot? Basically there are two ways to do it. The first one is using keyboard shortcuts and the other one is using an app. Windows 11 comes with Snipping Tool, though has limited features, but should be good enough for taking a simple and quick screenshot.
How to Take Screenshots Using Keyboard Shortcuts
- Print Screen: copy the entire screen to the Clipboard
- Alt + Print Screen: copy the active window to the Clipboard
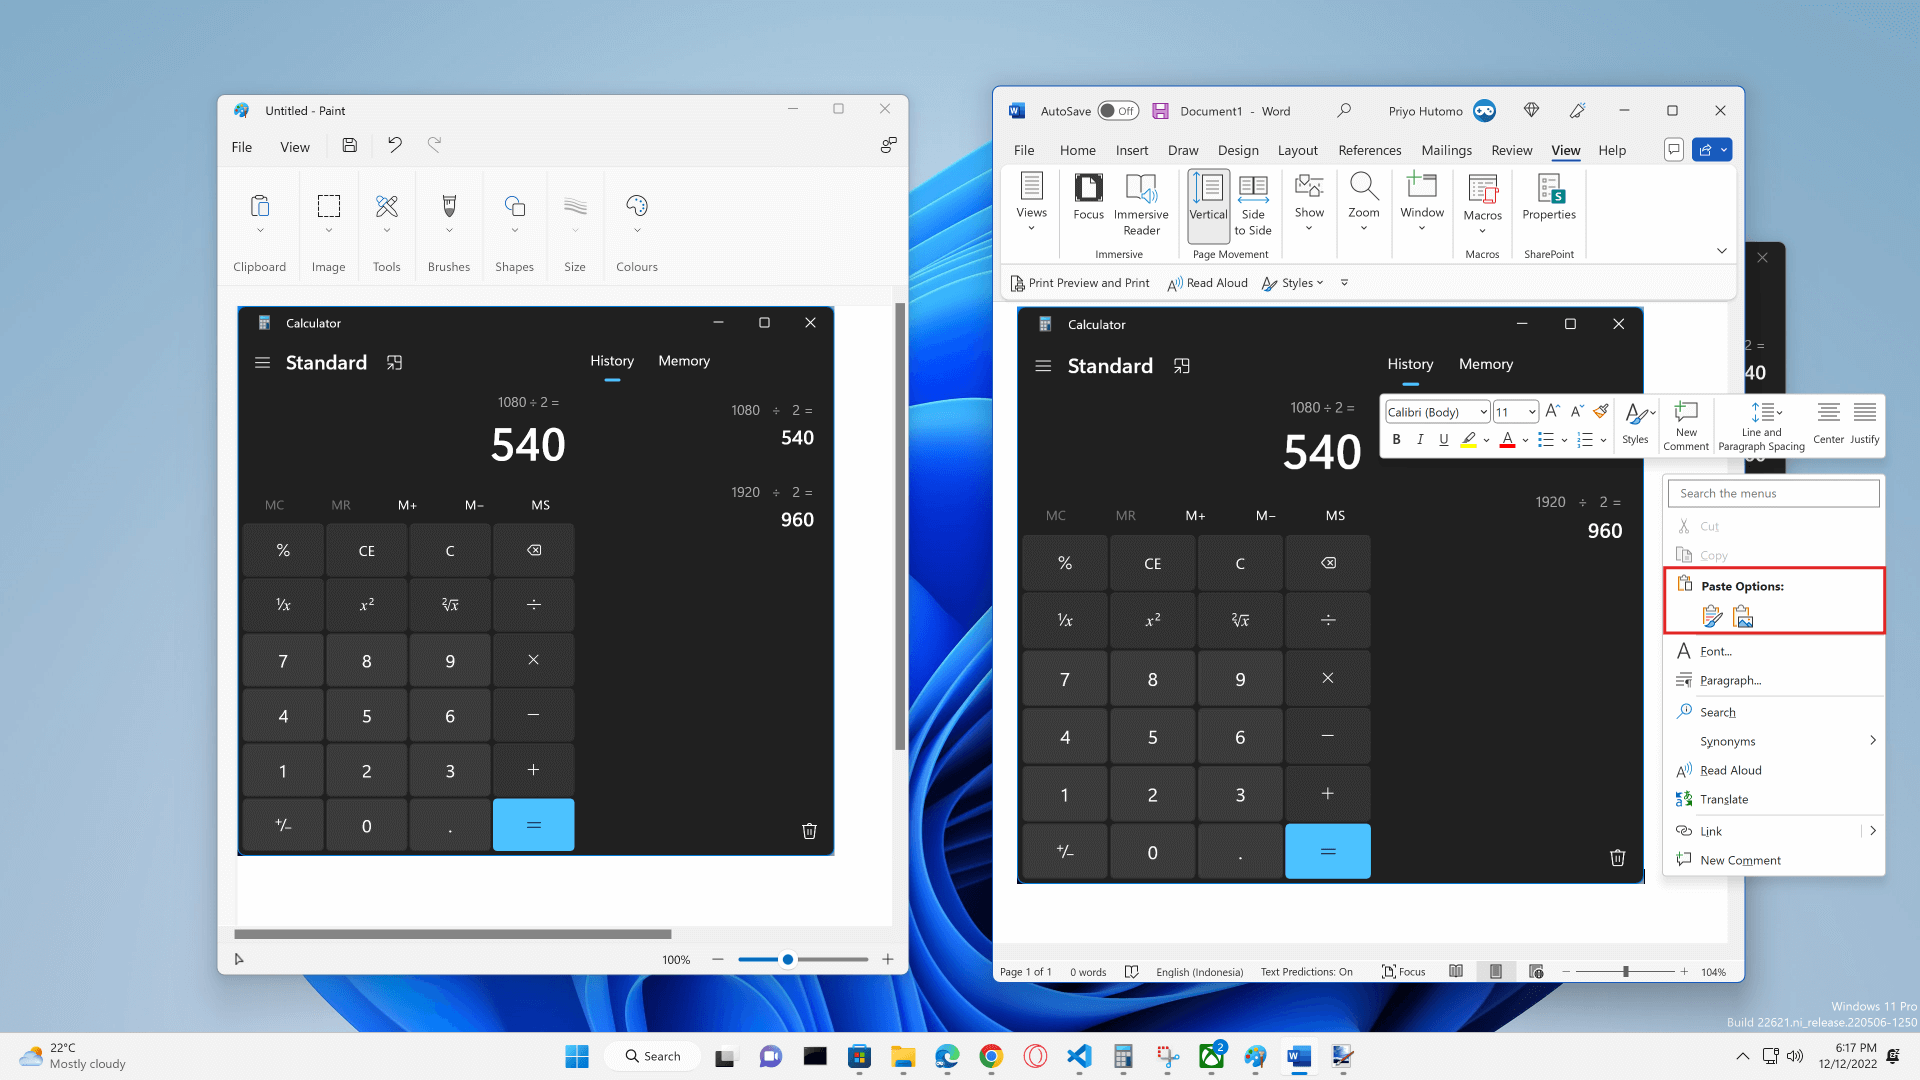
To use image from the Clipboard, you can press Ctrl + v or select paste menu on supported apps.
- Windows + Print Screen: copy the entire screen to a png file
This shortcut will save the screenshot image into Pictures > Screenshots folder. - Windows + Alt + Print Screen: copy the active window to a png file
This shortcut will save the screenshot image into Videos > Captures folder.
Note: on some laptop keyboards and compact keyboards, the "Print Screen" button (sometime written as "Prt Sc") might be needing assistance from the Function key, labelled as "Fn". So, for example, instead of pressing Alt + Print Screen you need to press Alt + Fn + Print Screen.
How to Take Screenshots Using Snipping Tools
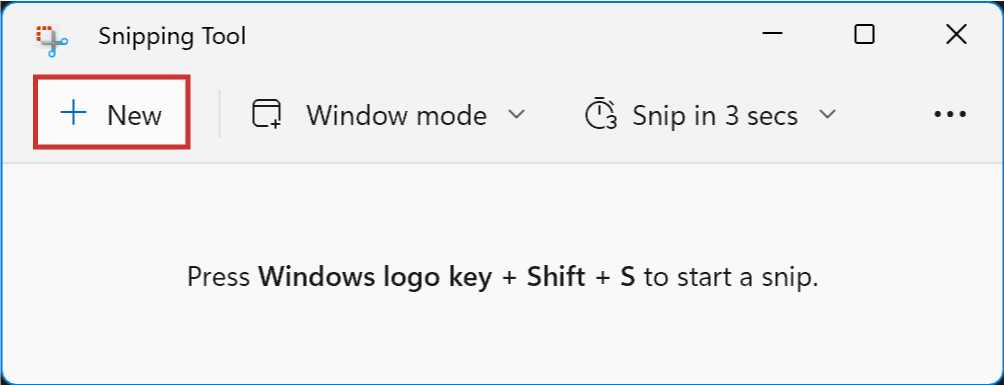
Taking a screenshot using keyboard shortcuts is very fast, but very limited in features. If you're looking for something more advances then you need to use Snipping Tools. To open the Snipping Tools, you can press Windows + Shift + S.
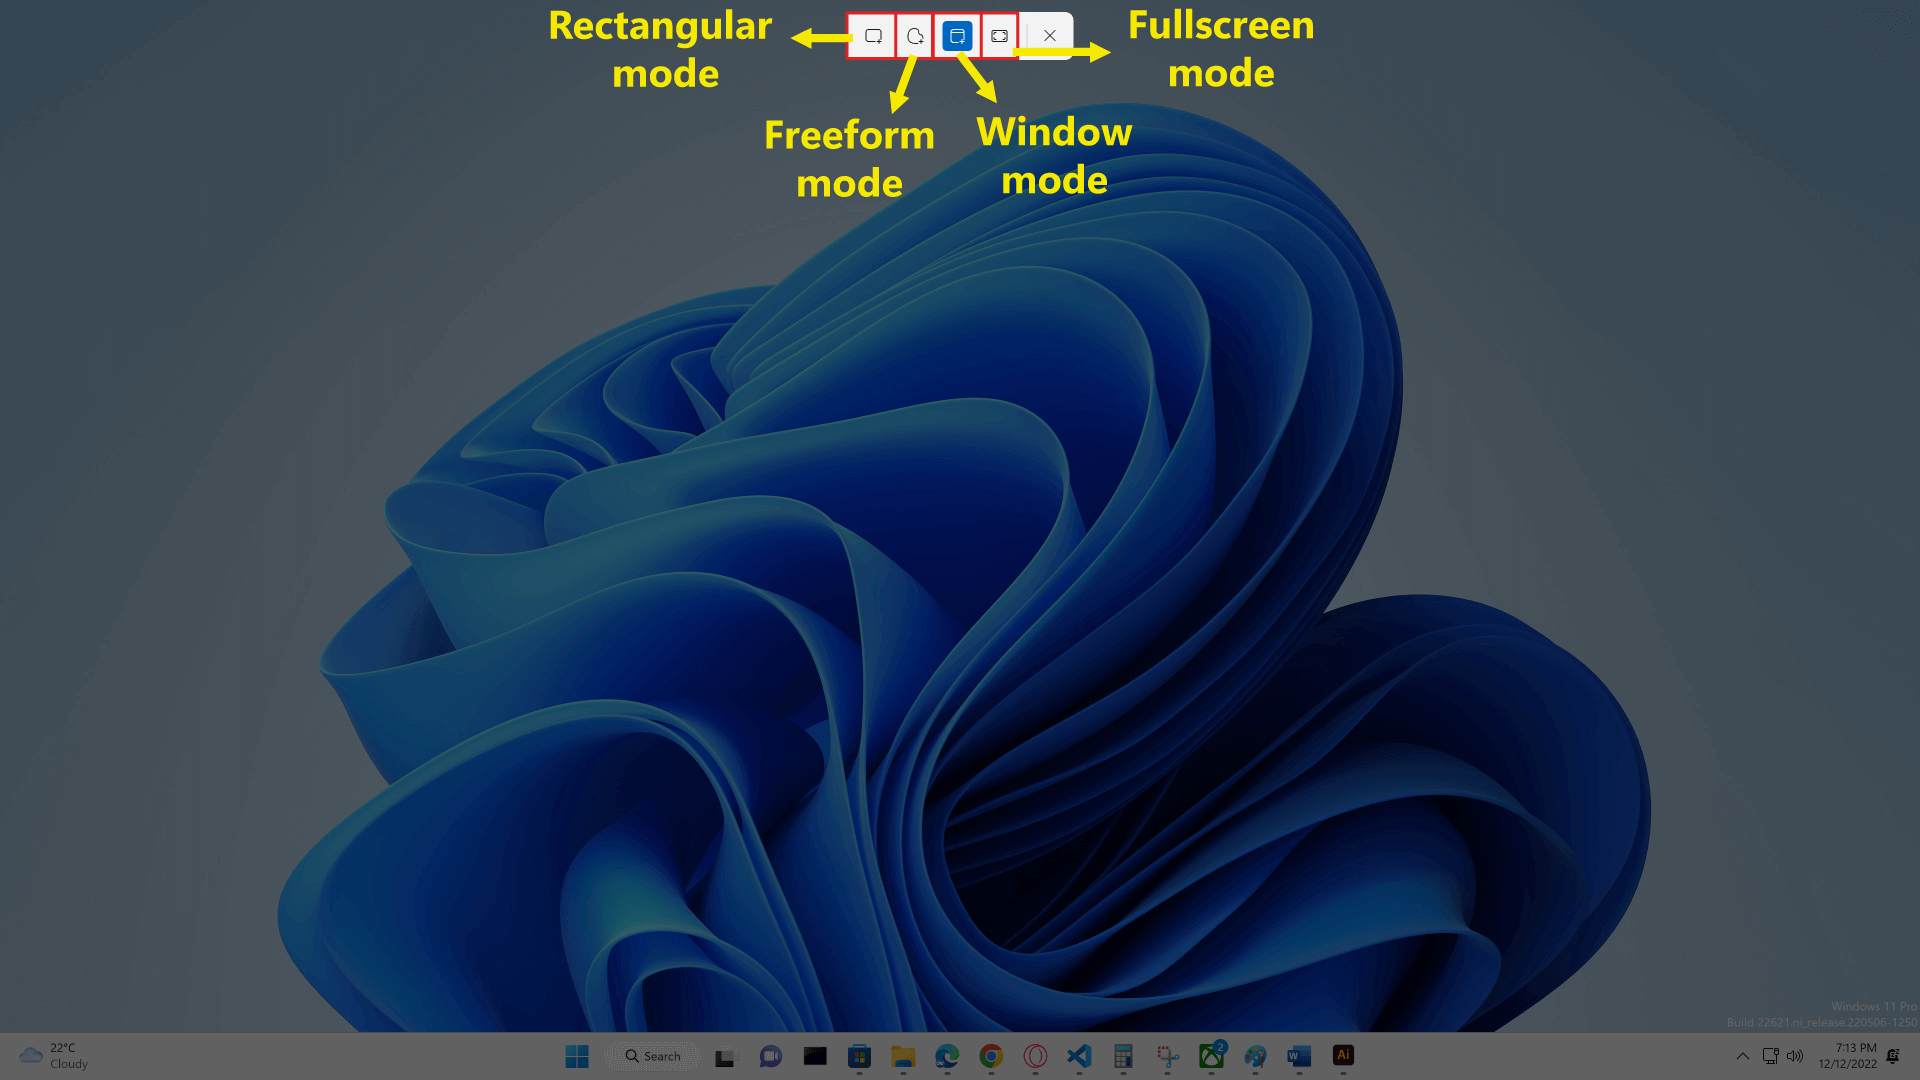
Using the Snipping tool, in addition to taking screenshot in fullscreen and window mode, you can also select part of the screen that you want to capture. There are two modes that you can choose to take a custom screenshot:
- Rectangular mode: this mode allows you to take a screenshot of a rectangle area of the screen.
- Freeform mode: this mode allows you to take a screenshot of a custome shape area of the screen.

Rectangular mode

Freeform mode
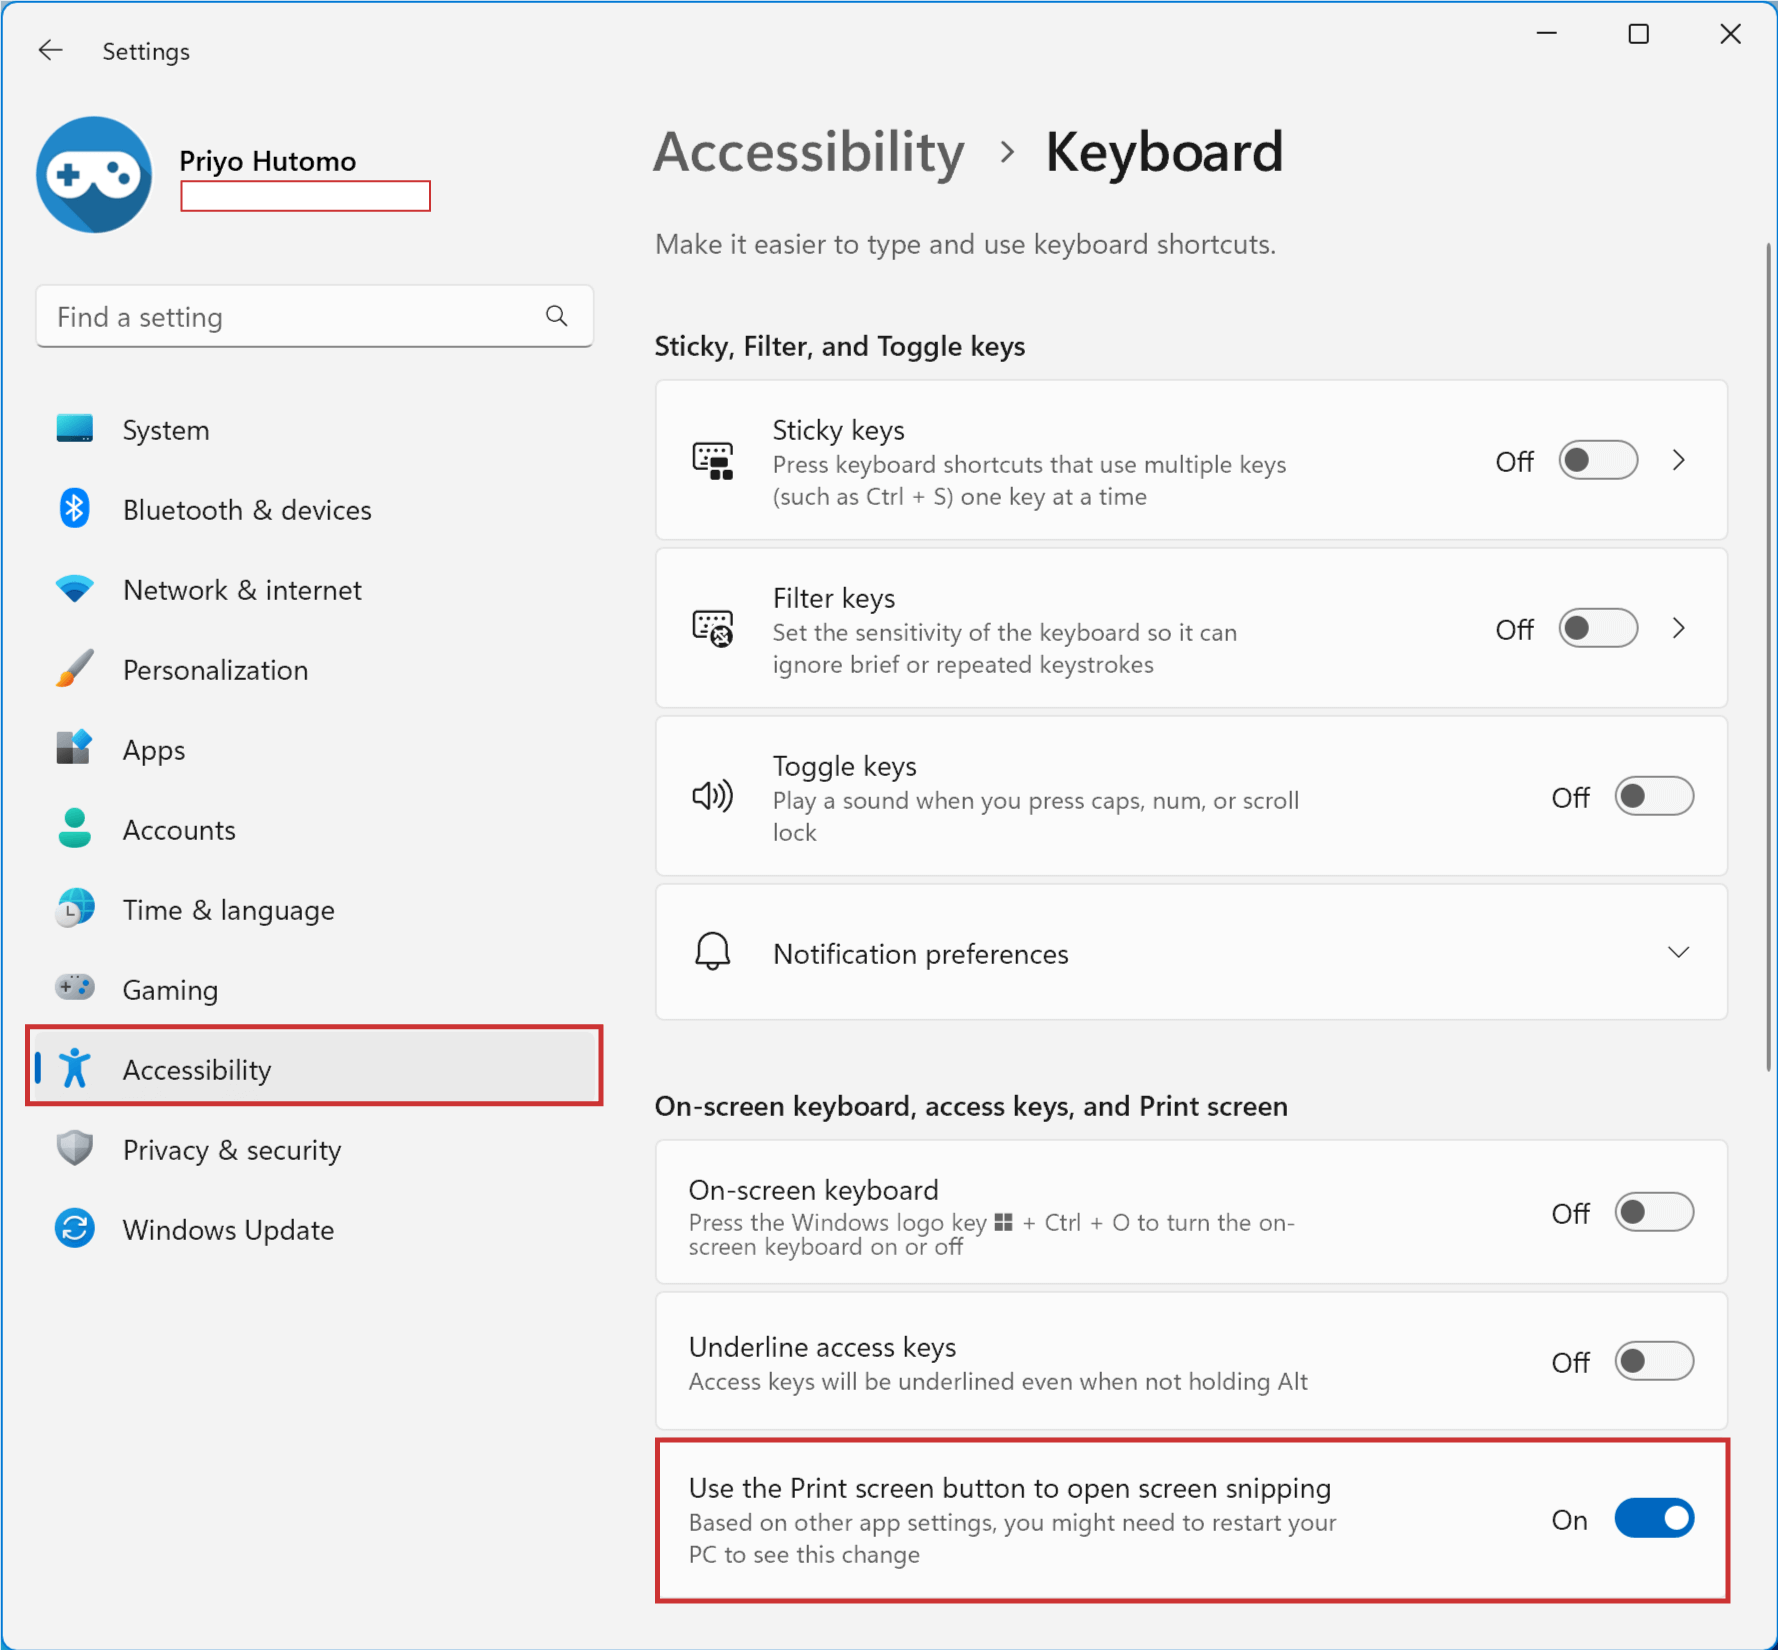
If you frequently use Snipping Tool, you may want to change the shortcut key from Windows + Shift + S to Print Screen. To do this, navigate to Settings > Accessibility > Keyboard and go to "On-screen keyboard, access keys, and Print screen" section. Set the "Use the Print screen button to open screen snipping" to "On".
Beside using keyboard shortcut, just like other Windows apps, you can also open the Snipping Tool from Windows Start Menu.
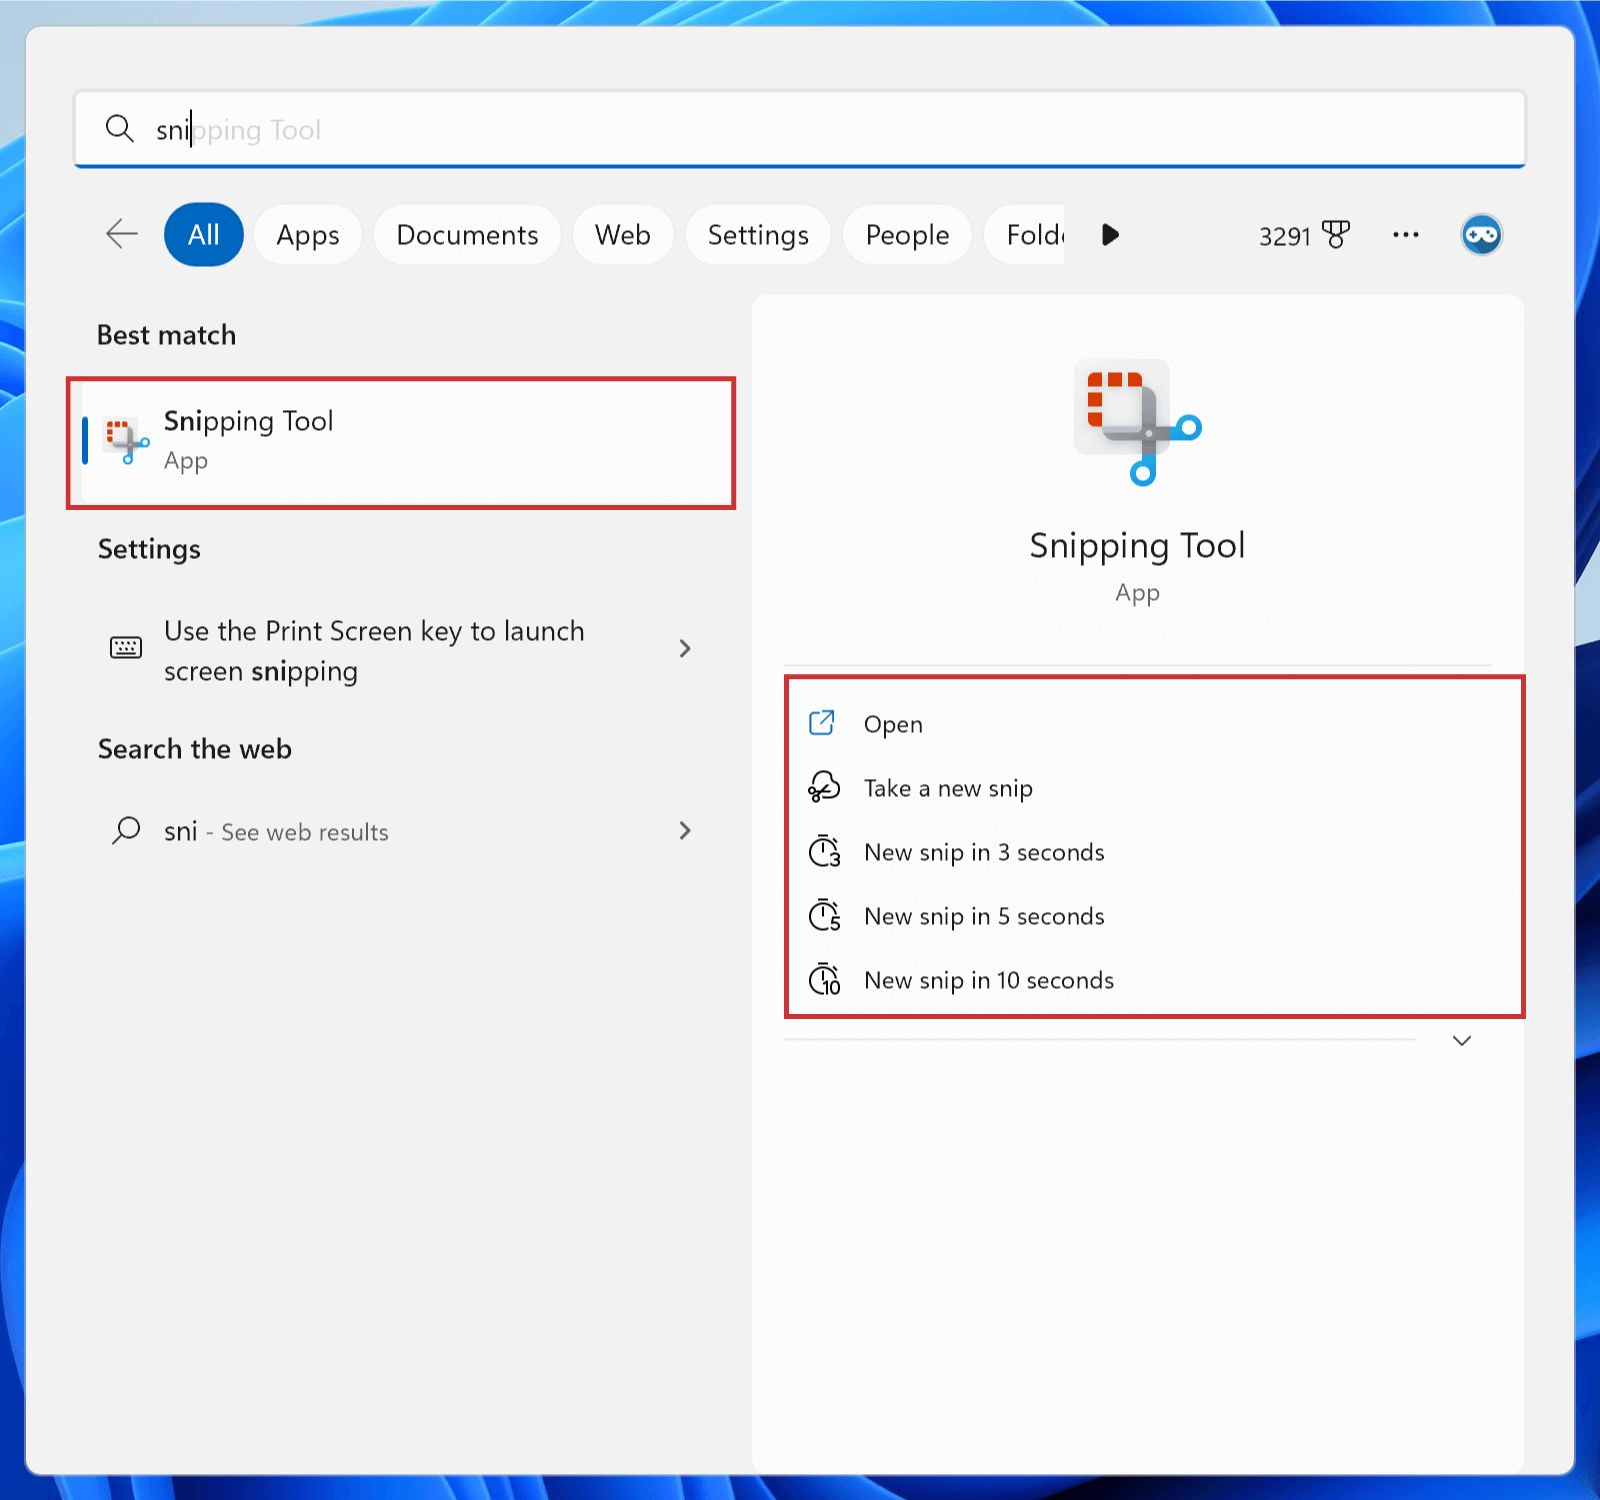
One benefit of opening the full Snipping Tool app is that you can access the delayed screenshots feature. You can set the delay to 3s, 5s, or 10s. When you're ready to take a screenshot, click the "New" button.